Text, lists, tables and buttons
Write and style the words in your email: fonts, sizes in points, links, lists, tables, highlights and buttons.
In this lesson
- Format text with the toolbar and the properties pane
- Add links, symbols and merge fields
- Use lists, tables, highlights and buttons
Writing and formatting
Click into any text on the email to type. Select words and a small toolbar appears above them: bold, italic, underline, text colour, highlighter, link, symbols, field, and clear formatting. Ctrl+B, Ctrl+I, Ctrl+U and Ctrl+K (link) work too.
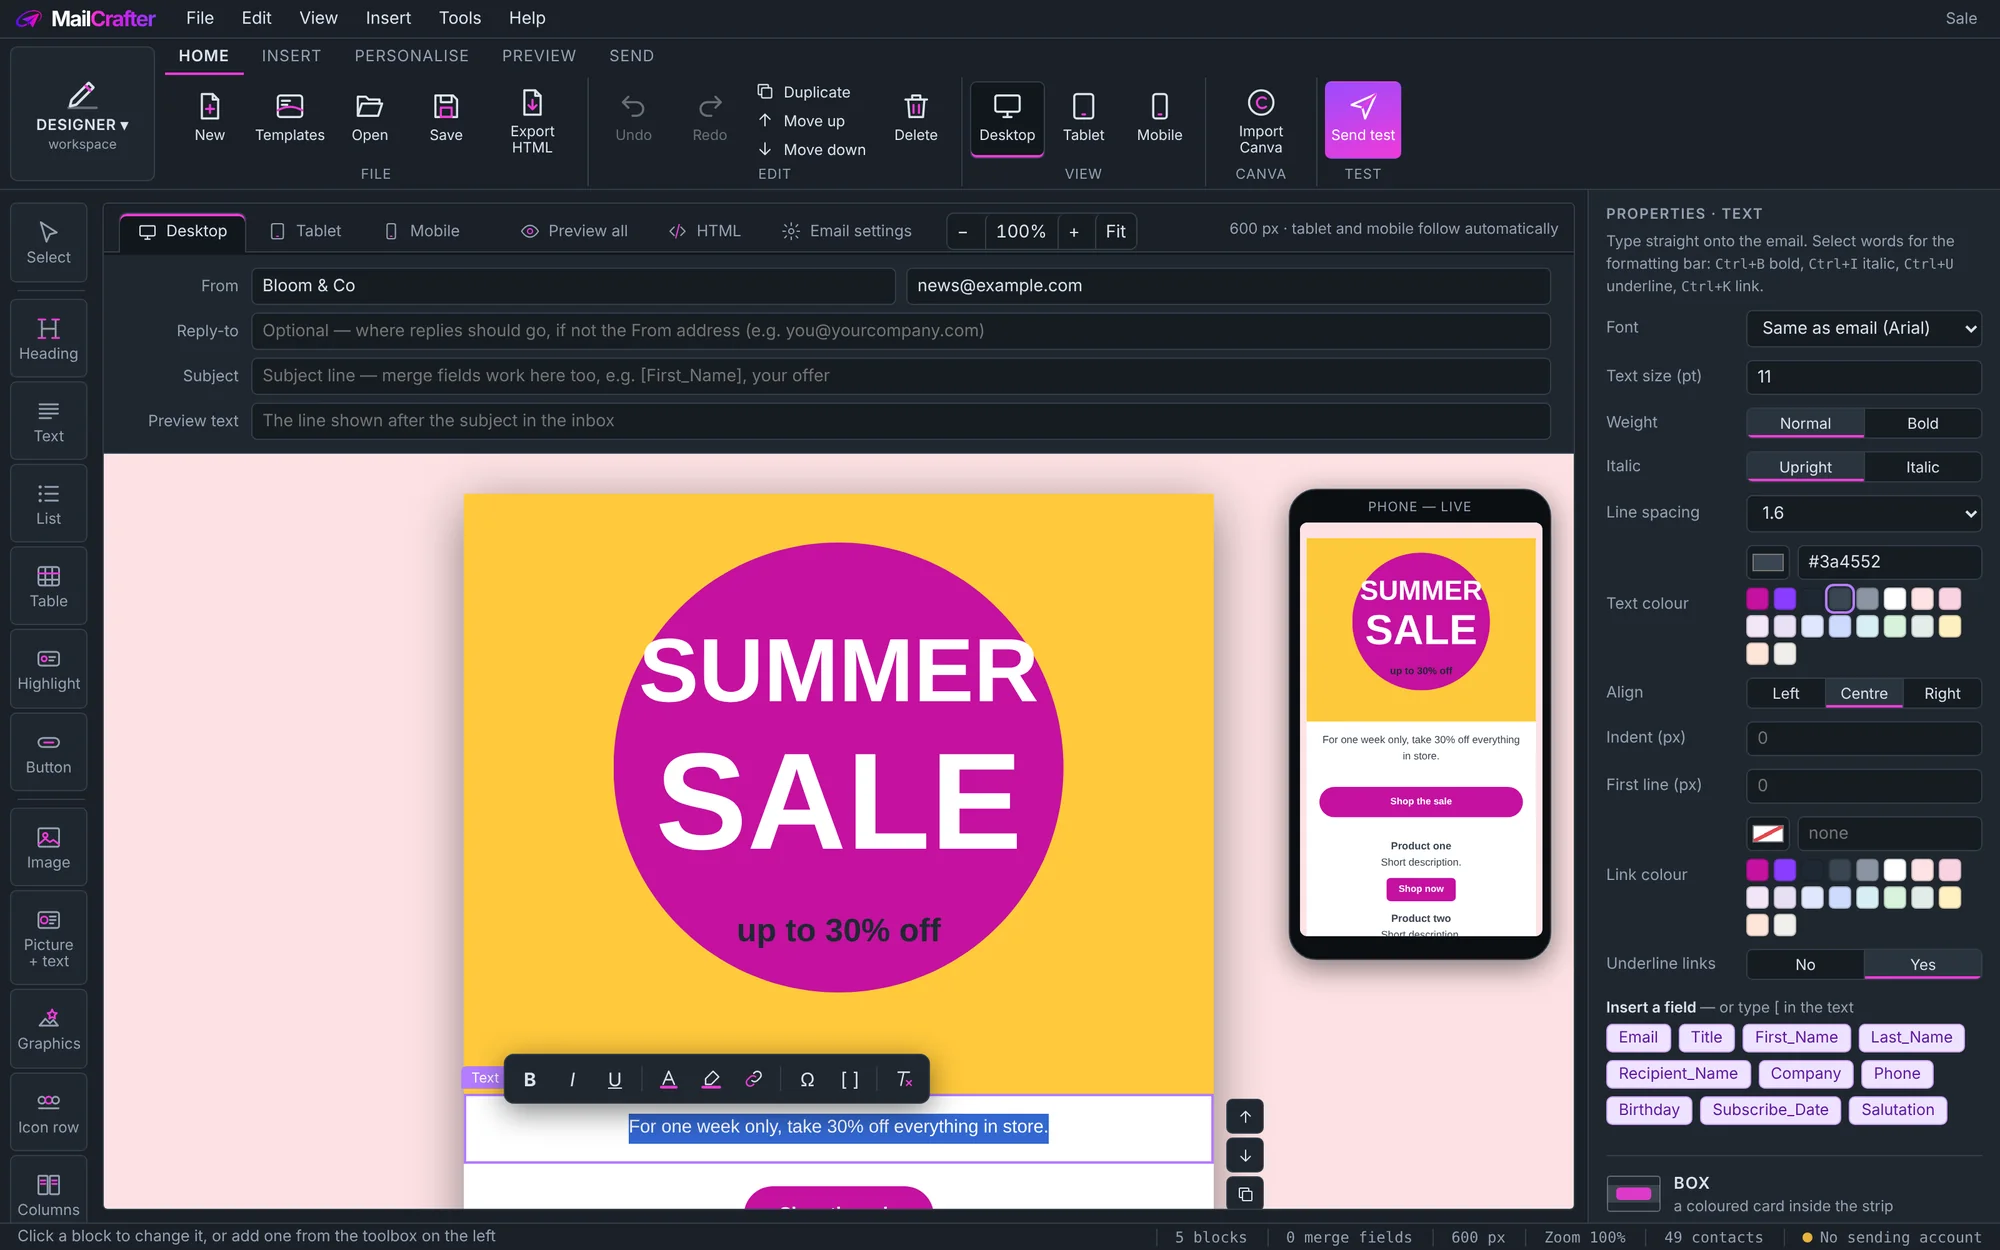
The properties pane sets the whole block: Font, Text size (pt), Weight, Italic, Line spacing, Text colour, Align, Indent and First line indent, and the colour of links. Sizes are in points, as in Word or Outlook: 11 pt is normal body text.
Lists and tables
- List makes bullets or numbers. Choose the bullet symbol or numbering style, its colour, the space between points and the indent.
- Table opens a gallery of styles. Add and remove rows and columns, choose a header row, borders, stripes and rounded corners.
Highlights and buttons
- Highlight puts a message in a coloured box: info, tip, warning, quote or offer, with an icon if you like.
- Button opens a gallery of styles. Set its Label, Link, colours, Corner radius and Width (fit the text, or full width), and add a fade, a Shadow, a Glow or an arrow.
Give every button and link a full web address, starting with https://.
Personal words
Click Field on the toolbar, or a field under Insert a field, to drop a merge tag into the text, such as [First_Name].
See Lists, fields and merge tags for fallbacks and date formats.
Revision history
| Revision | Date | What changed |
|---|---|---|
| 1 | 21 November 2026 | First edition. |