Lesson 07 · Design
Pictures and graphics
Add your own pictures, style them, and decorate the email from the built-in graphics library.
Revision 1 · 21 November 2026About 8 minutes
In this lesson
- Add and style pictures
- Use Picture + text, Columns and Icon rows
- Find graphics, stickers and animations, in 3D or flat
Pictures
- Add an Image block, then click Choose picture…, or simply drag a picture file from your PC onto the email.
- In the properties pane set its Width (%), where a click goes to, and its Alt text: the words shown if pictures are turned off. Add a Caption under it if you like.
- Style it with rounded Picture corners, a frame or a shadow. Rounded corners are baked into the picture when you send, so they show in Outlook too.
Picture + text puts a picture beside a title, a few lines and a button, which is handy for products. Columns sets 2 to 4 items side by side; they stack one under the other on phones.
The graphics library
Click Graphics in the toolbox to open the library: stickers, emoji, food, beauty and shopping graphics, shapes, arrows, dividers, badges and icons, and holidays for every major faith. Use the search box to find one, and the 3D / Flat switch to choose the style.
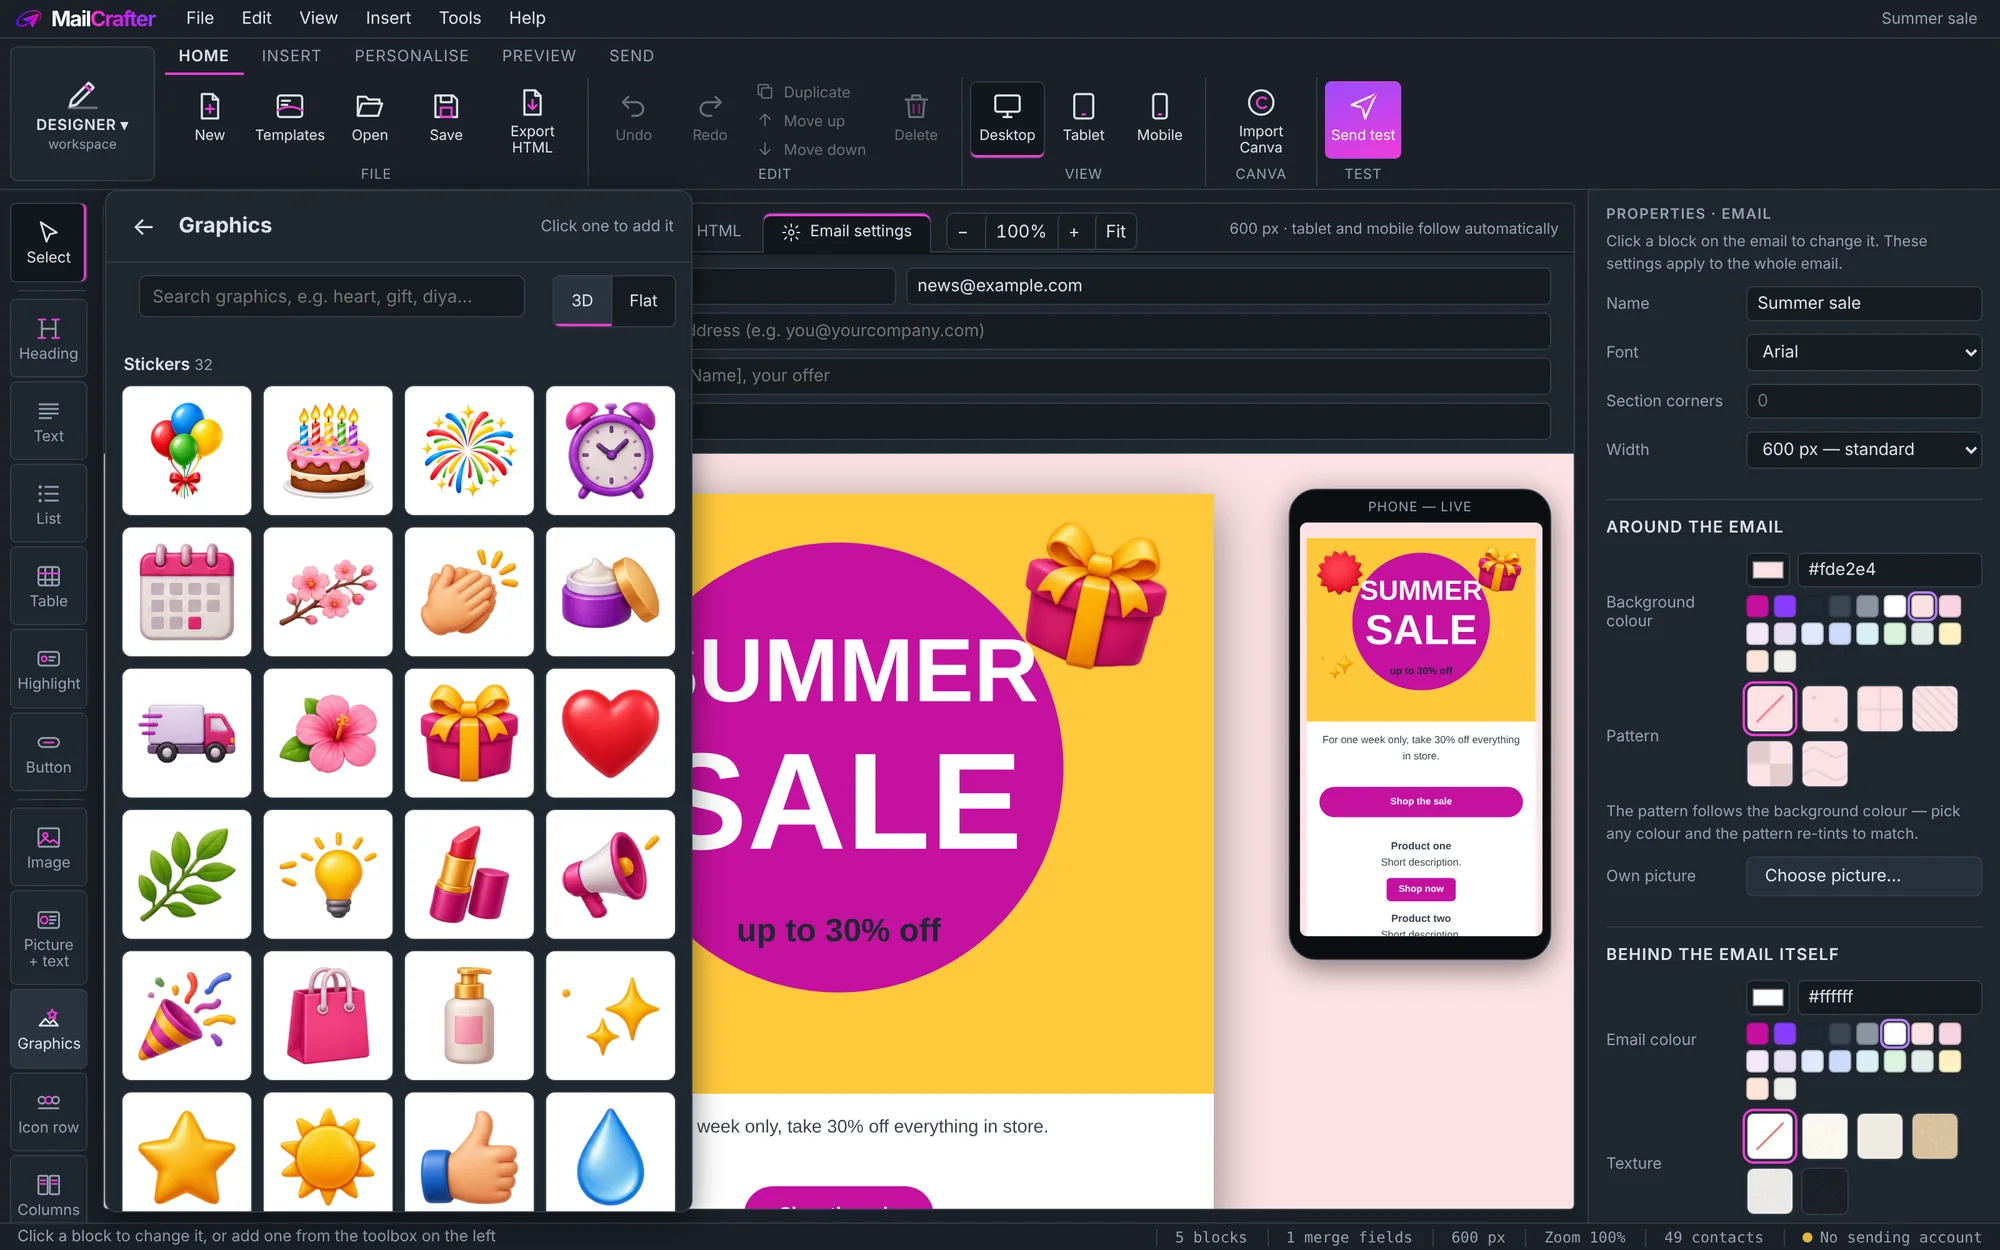
- Badges carry your own words, such as "20% OFF" or "NEW".
- Icons can be any colour, to match your brand.
- Animations move in the inbox. Classic Outlook 2016 and earlier show only their first frame.
- With a hero selected, a graphic goes onto the hero as a sticker instead of becoming a new block. See Hero banners and layers.
Icon rows
Icon row puts icons with a label under each in a row, for "Free delivery · Open 7 days · Easy returns". Pick a style from the gallery, then change the icons, words and colours.
Try it. Add an Icon row under your main offer with three reasons to buy from you.
Revision history
| Revision | Date | What changed |
|---|---|---|
| 1 | 21 November 2026 | First edition. |