Lesson 01 · Start
Getting started
Install MailCrafter, find your way around the three workspaces, and set it up the way you like.
Revision 1 · 21 November 2026About 5 minutes
In this lesson
- Install MailCrafter and open it
- Know the three workspaces and how to switch between them
- Find the ribbon, the properties pane and the status bar
Install
- Download MailCrafter and run
MailCrafter-Setup.exe. - While MailCrafter is in beta its installer isn't signed yet, so Windows may hold it back. In your browser choose Keep; if a blue "Windows protected your PC" box appears, click More info, then Run anyway.
- MailCrafter opens with its Welcome Screen.
The Welcome Screen
The Welcome Screen has three panels, one for each part of the job: Mailing lists, Designer and Campaigns. Each panel has shortcuts to the things you do most (import a list, start a new email, start a campaign) and shows your recent work.
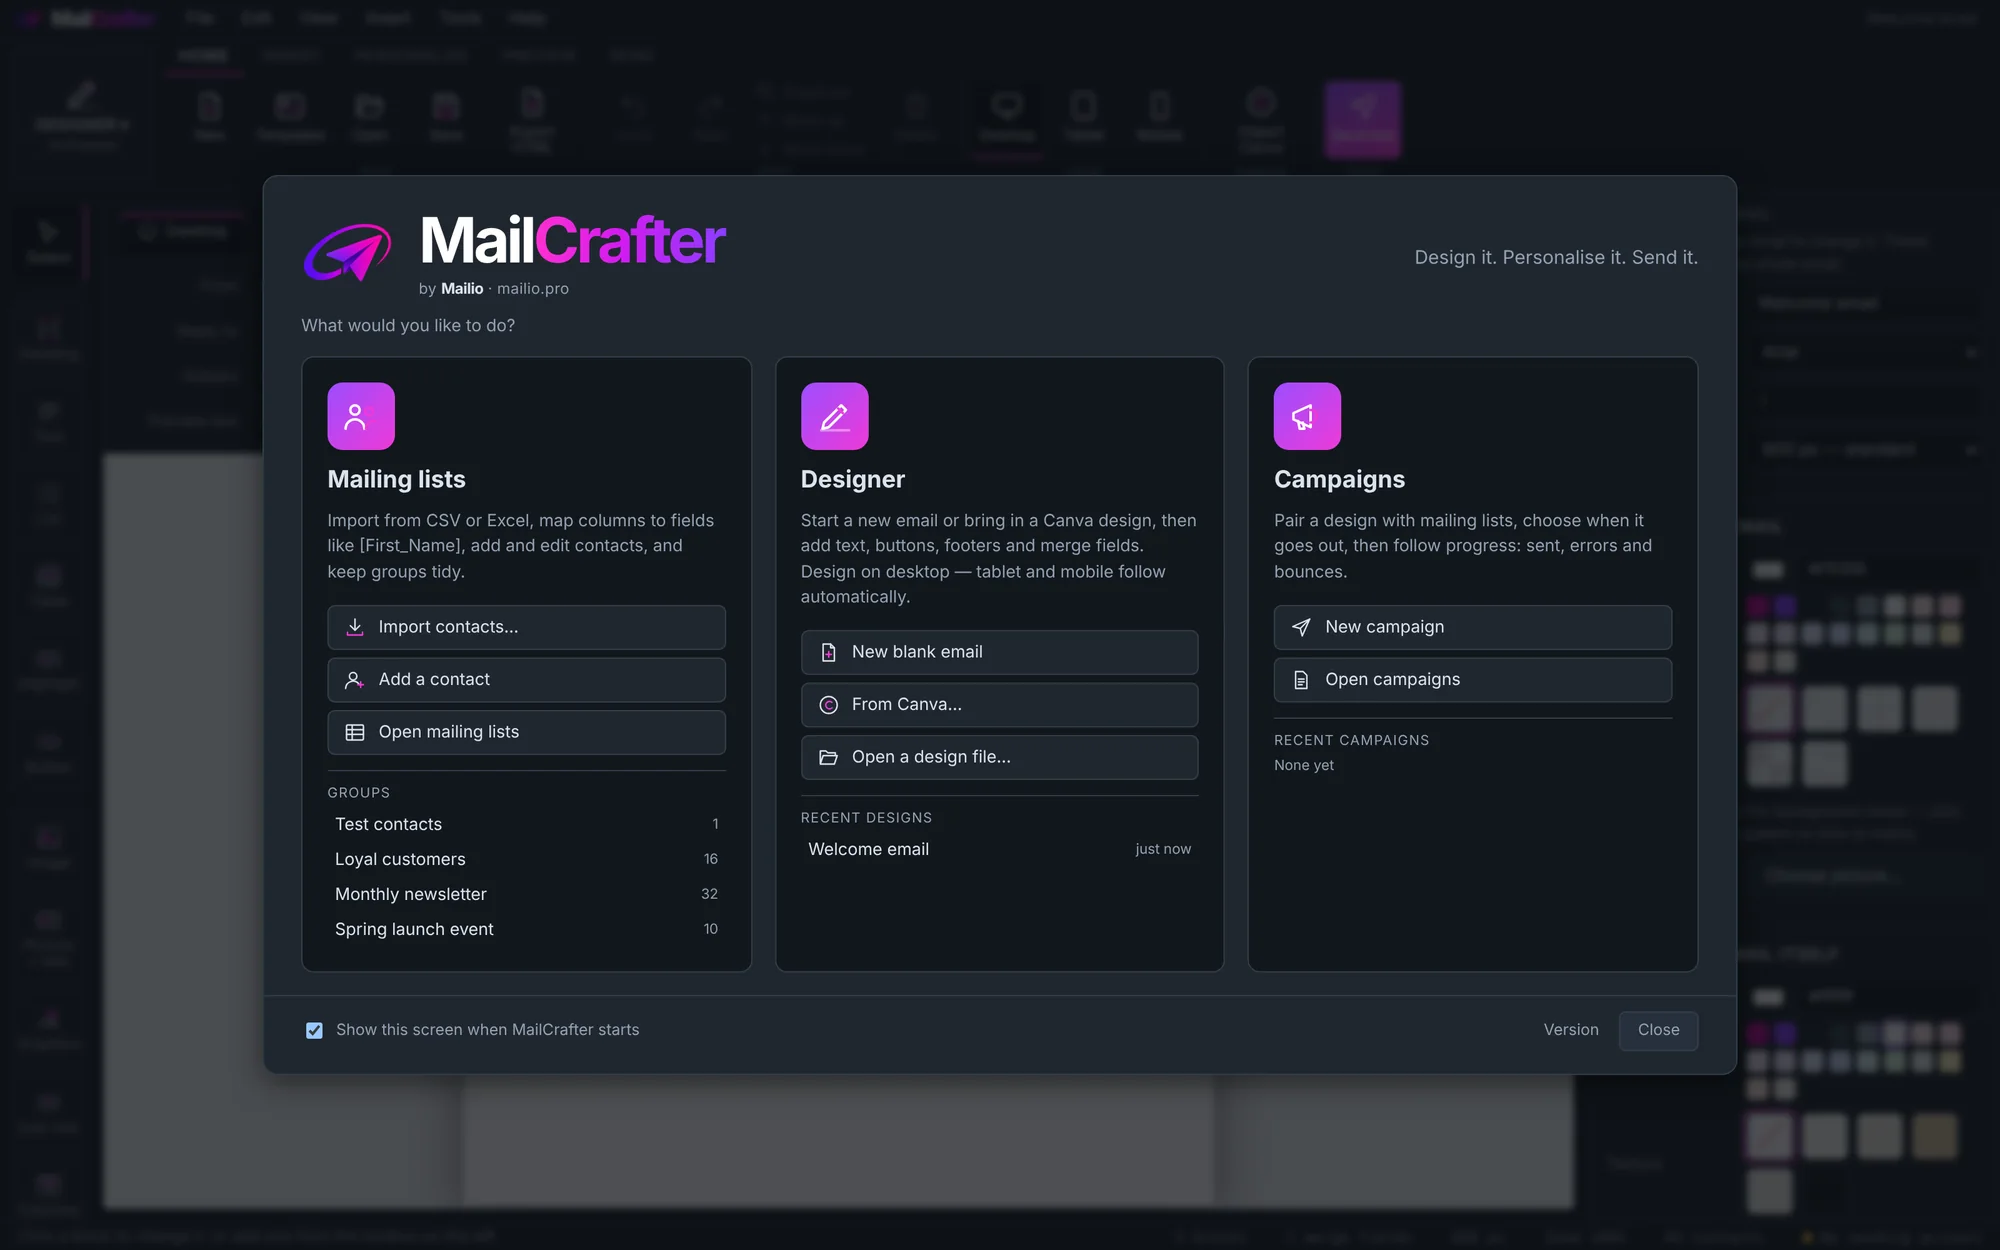
Close it to go to the designer. If you'd rather not see it every time, untick Show at start-up in Tools › Options.
The three workspaces
- Mailing lists: your subscribers, their fields, your lists (groups) and the exclusion list.
- Designer: where you make the emails.
- Campaigns: where a design is paired with lists and sent.
Switch between them with the big workspace button at the left of the ribbon, which shows the one you're in.
Finding your way around
- The ribbon along the top holds the commands for the workspace you're in, grouped under tabs such as Home, Insert and Personalise.
- The properties pane on the right shows the settings of whatever you've selected. With nothing selected, it shows settings for the whole email or list.
- The status bar along the bottom tells you how many blocks, fields and subscribers there are, and whether a sending account is connected.
Try it. Open Tools › Options and switch Theme between Dark and Light, then pick the one that's easier on your eyes.
Next: connect the email account MailCrafter will send through.
Revision history
| Revision | Date | What changed |
|---|---|---|
| 1 | 21 November 2026 | First edition. |